Have you ever noticed that when you put on sunglasses, it stops you from squinting in the sun and makes everything just look a little bit nicer? Well, the drone camera is exactly the same! That’s why today, I’m walking you through ND filters and how they make your shots look tons better.
All these videos were taken with the DJI Mini 3, and the ND filters I’m using are Neewer ND filters—really, really good kit, I highly recommend them. But yeah, let’s get into it!
Testing ND Filters on the DJI Mini 3
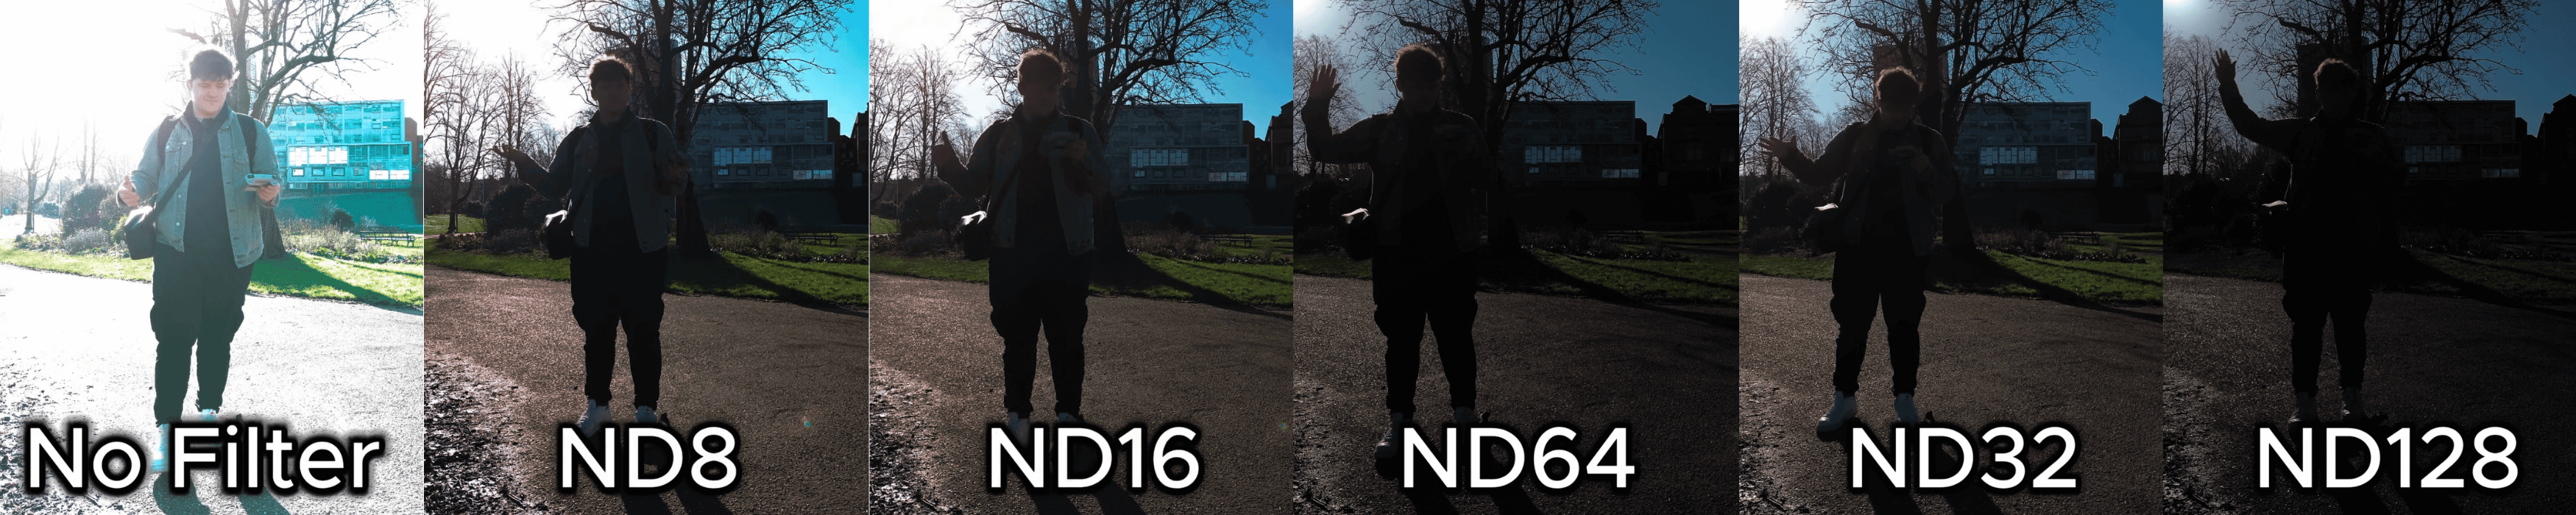
So we’re starting out with zero filter on the drone, and as you can see, it’s really, really bright. Way too much light, and it’s blowing out all the details.
Now we go up to ND8, and it’s a bit better.
ND16—a little better again, starting to control that exposure.
ND32—now we’re talking! You can see the balance is much better.
ND64—it’s getting a little dark now, especially in the shaded areas.
And then ND128—pretty much pitch black at this point, way too dark for most situations.
Picking the Right ND Filter
So now I’ll show you a drone flying with ND128, and as you can see, it’s really dark—picking up all the shadows, but definitely too much for this shot.
Going back down to ND16, and this is much better. For this specific shot, I’d probably go with ND32 for the best balance.
Finding the right ND filter can be tricky sometimes, but you’ll get used to it. It all depends on the lighting conditions and what kind of shot you’re going for.
Why You Need ND Filters
ND filters are an absolute must-have in your drone bag. They:
- Make your shots look tons better by reducing brightness and improving contrast.
- Prevent overexposure, so you don’t lose important details in the highlights.
- Let you control your shutter speed, which helps create that smooth, cinematic motion.
Honestly, they make such a massive difference, and I definitely recommend having a set ready to go.
That’s it for today—see you guys in the next one. Cheers!